eSurveyCreator is now SurveyHero

Up until now, we have been running two separate online survey platforms, namely eSurveyCreator and SurveyHero.

Today we are excited to announce that we have merged eSurveyCreator into SurveyHero (https://www.surveyhero.com). This will allow us to strengthen our brand and to prevent confusion.

The brand SurveyHero is not only shorter, but we do believe it is also more memorable than eSurveyCreator. Along with this rebranding, we have also freshened up our website with a new design.

If you have an eSurveyCreator account, then nothing will change for you, except that you and your survey participants will be redirected to surveyhero.com. All of your surveys, survey links, etc., that you may have already shared, will continue to work. You can also continue to share “old” survey links that use the domain esurveycreator.com.

Enterprise customers using a White Label solution will not be affected either. All survey links using a custom domain will continue to work unchanged.

This is the first step in a series of improvements that we have been working on for a long time and we look forward to bringing you more updates soon.

Please do not hesitate to contact us at support@surveyhero.com should you have any questions.

Question and answer PIPING in your questionnaire

Starting from product “Pro” and higher, you can make use of piping functionality in your questionnaires. Piping allowes you to make your online survey more dynamic by reusing a participant’s answer to a specific question in a later question again. Here’s a working example:

piping-example

Note: Question 2 is piping answers from question 1; only the selected answers in question 1 are shown in question 2. Also, it is possible to take up answers in text format again.


How it works (based on above example)

1. First of all, you need to create at least one question we can use as piping reference. Let’s call this the “reference question“.

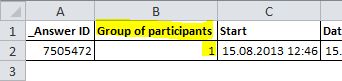
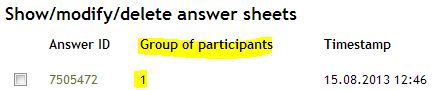
2. Once you have created your reference question, you must assign it an identifier – a unique name you can later refer to (“visited-cities” in this example):

piping-example-set-identifier


3. We can now create a second question, in which we will take over the selected answers from the reference question. This new question is the “piping question” and must be located in another, subsequent page within the questionnaire.

4. In this question, we will refer to the reference question by using its identifier “visited-cities”. The identifier must be wrapped in double curly brackets: {{visited-cities}}


piping-example-create-piping-question


Done!

That’s all you need to do: Assign an identifier to one question and refer to it with the appropriate placeholder {{identifier}} in another question, text, or wherever you like.

You can even use the new piping question as a reference question for further piping:

piping-example-use-piping-question-as-reference


Further piping options

Restrict the number of answers that are taken over

In some cases, especially when using ranking questions, you might need piping only to apply on e.g. the top 3 answers. This can be done by appending the following addon to the placeholder:

{{identifier}}[3]

This addon will take over max. 3 answer from the reference question. Here’s an example:

piping-example-restrict-max-number-of-rows


Alternative text for empty piping

With piping one can replace a placeholder {{identifier}} with a previously given answer. However, if no answer was given, the placeholder is replaced with an empty string. For such cases, it is possible to define alternative text that is shown instead:

{{identifier}}{This is the alternative text.}
or
{{identifier}}[2]{This is the alternative text.}

Just wrap the alternative text in curly brackets and add it right after your piping placeholder (no spaces in between). Here’s a working example:

piping-example-alternative-text


Negative piping

You can also pipe answers that were NOT selected previously. To do so, just add a minus sign between the two first curly brackets:

{{identifier}}

This option is only available when piping into another question. It is not available when piping answers to text.

How do you count “answers”?

Some products of eSurveyCreator.com have a limit* of answers that can be evaluated.

With our free survey solution “Basic” for example, you can evaluate a maximum of 350 answers. Each response given by a survey participant counts as an answer.

Thus, questions with multiple choices can count several answers.

Example: The following figure counts 3 answers.


* Even if the maximum number of answers of your account was reached, we’ll not stop to store new responses from new participants. We’ll only stop to display them in the evaluation. You’re then free to decide whether you wan’t to do an upgrade or not.

Split the participants into groups and evaluate the answers group-specificly

Sometimes you want to group the participants of your survey or you need to know, where all the different answers came from. Should you distribute your survey link e.g. by e-mail, with posts in blogs and forums as well as by regular mail, it may be interesting to analyse the responses of those groups (e-mail, web, regular mail) separately.

In order to group the participants you have the possibility to modify the original survey link with an arbitrary number (1-255). This extension can be found in the evaluation again.

Modify survey link

Imagine you receive the following survey link for your survey:

Your survey link

You can now slightly modify it by attaching the following add-on: &he=1

You can chose numbers from 1 – 255.

The above link should now look as follows: https://www.esurveycreator.com/s/ff250bb&he=1

This way you can send/share for each participant group one individual link:

By e-mail: https://www.esurveycreator.com/s/ff250bb&he=1
Posts on blogs and forums: https://www.esurveycreator.com/s/ff250bb&he=2
By regular mail: https://www.esurveycreator.com/s/ff250bb&he=3

Find group code in the results

Afterwards the results of the survey can be filtered very easily by groups of participants in the online evaluation.

Filter by groups of participants II

All defined codes (1, 2, 3, etc.) can be also found either in the Excel and CSV result export:

Group of participants Excel

as well as in the overview of the individual answer sheets:

Group of participants smdas


Thereby you are able track the participant groups. If you want to track a single participant, you can create personalised survey links.


Share your survey results via a simple link

You can easily share your collected results with all interested groups of people by sharing a simple link.

To do so, go to the “Settings” of the concerned survey and scroll down to item “Publish results“.

After having enabled this option you’ll receive a direct link, which you can forward to any third party that may be interested in the survey results. The results are also displayed in real-time.

However, third parties have no possibility to change any of the data (e.g. delete data), why you don’t have to worry.

At what time does the duration of my survey begin to count?

The duration of your survey starts to count from the moment you activate it, earliest though from the moment we get your payment (in case of paid surveys).

This means you can take as much time as you need to carry out your questionnaire. We only start to count the duration from the time you start/activate your survey.

Approximately three days before closing time of your survey you’ll get an e-mail notification reminding you of that. You than have enough time to decide whether you want to upgrade/extend your survey or let it close normally. If latter, be aware that you won’t be able anymore to access your results after the closing of your questionnaire. Please evaluate your answers before closing and/or download your data as Excel or CSV.

Why aren’t all survey responses displayed?

In the survey evaluation you can see that you collected e.g. 900 answers but only can see the first 350? The reason is most probably that you exceeded the maximum amount of allowed answers you can have displayed with the chosen product (a similar notice should be displayed in your evaluation).

Please don’t worry! Even if you exceeded the maximum amount of answers of your product, we’ll continue to save new answers from your participants. It’s now up to you whether you decide to do an upgrade or not, in order to see all answers.

When do I have to pay for my survey and how can I do that?

First of all: You only pay if you want so!

All products (except the free version) on eSurveyCreator.com demand upfront payment. You can decide yourself if and when you want to pay for our services. We’ll never send you an invoice or the like, which must be paid.

The upfront payment can be done either by credit card (PayPal) or by bank payment. Right after we have received your payment your survey/account will be unlocked for the services you bought (you’ll get an e-mail notification as soon as this occurs).

Payments by credit cards are the fastest way to upgrade your survey/account since it occurs immediately. Upgrades through bank payments though can take up to three working days until we can unlock your survey/account, depending on your banks location.


Welcome to the eSurvey Creator blog!

2011 is a big year for eSurvey Creator. Since beginning of the year, our survey platform is continually evolving and had already its first major update in late April. Some changes can be seen immediately while others hide in the background – we give at all-time our best to improve our online survey tool to make it even better, faster and easier to use!

An novelty is thus this blog, on which you’ll find all future information about our survey tool as well as general knowledge on how to conduct surveys.

2011 is going to be a good survey year!